Drop Down MenusCSS Drop Down MenuPure CSS Dropdown Menu

Tuesday, March 26, 2019

Bot Builder SDK Template available for Visual studio 2019


Introduction:
Visual Studio 2019 streamlines your experience so you can get right down to focused work. Microsoft announced Visual studio 2019 will launch on April 2, 2019 with many attractive features. Initially preview version not supported Bot template.  Microsoft released update Bot Template with VS 2019 support on Feb 13, in this article, we will learn how to create a bot by using Visual Studio 2019 with Microsoft Bot Framework template, and will be testing it with the Bot Emulator version 4.2.1.
The Bot Framework enables you to build bots that support different types of interactions with users. You can design conversations in your bot to be free. Your bot can also have more guided interactions where it provides the users choices or actions. The conversation can use simple text strings or more complex rich cards that contain text, images, and action buttons. And, you can add natural language interactions, which let your users interact with your bots in a natural and expressive way.
Prerequisites:
  1. Download Visual Studio 2019 Preview ++
  2. Download the Bot Framework V4 Emulator for your platform from the GitHub releases page.
Create New Project:
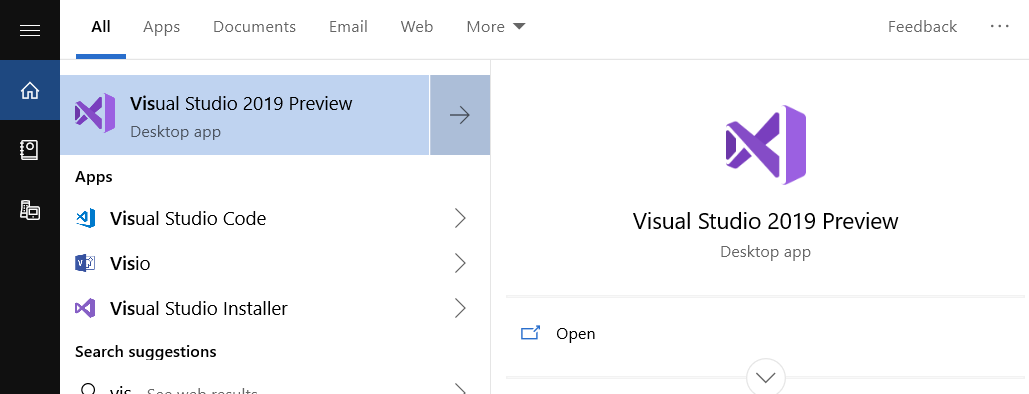
Let's start with creating a new Bot application using Visual Studio 2019. Go to Windows >> Visual Studio 2019.
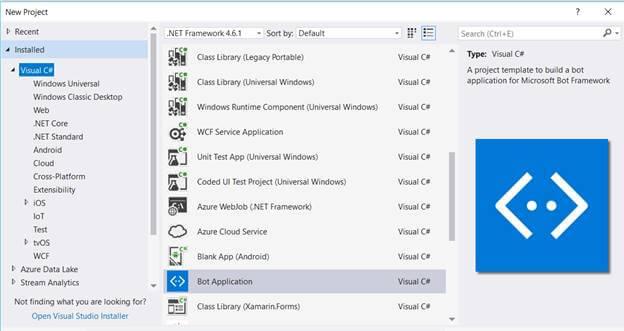
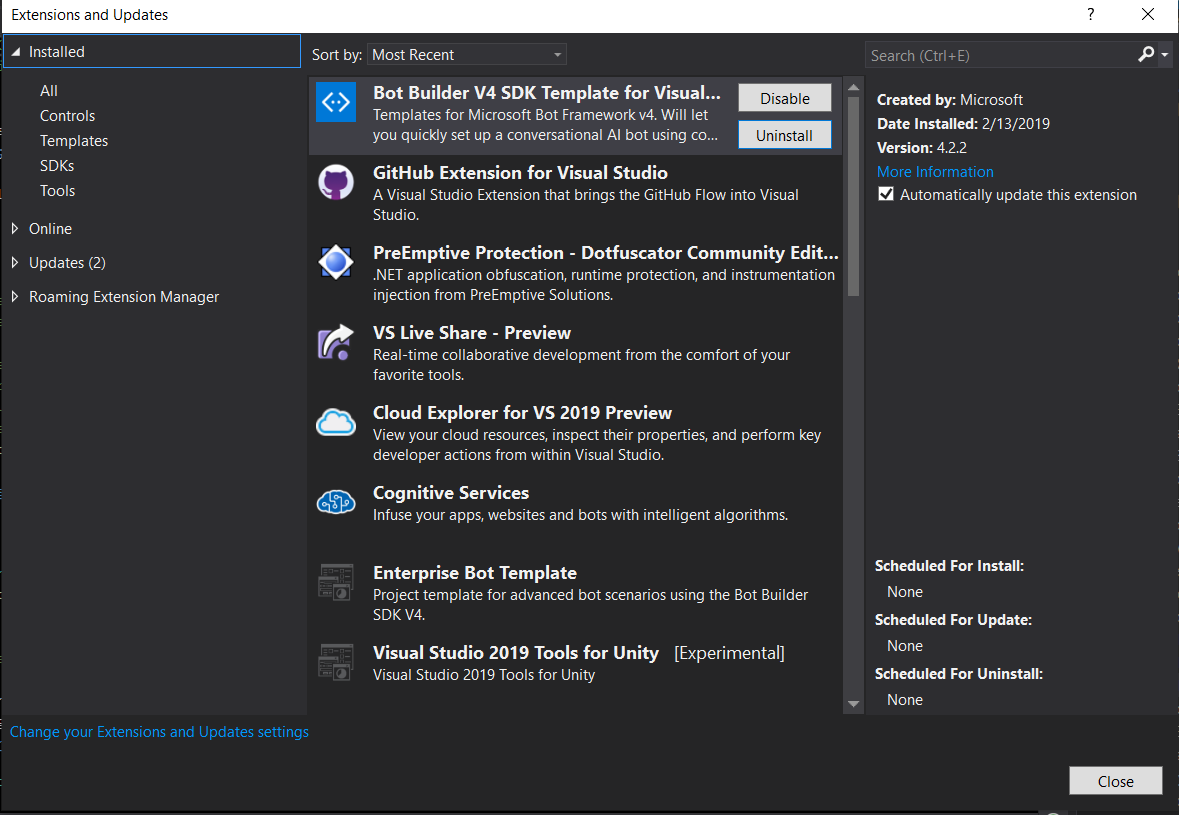
Before create a new project, Install the Bot Builder template from Tools >Extensions and Updates and search Bot Build V4 SDK > click on Install
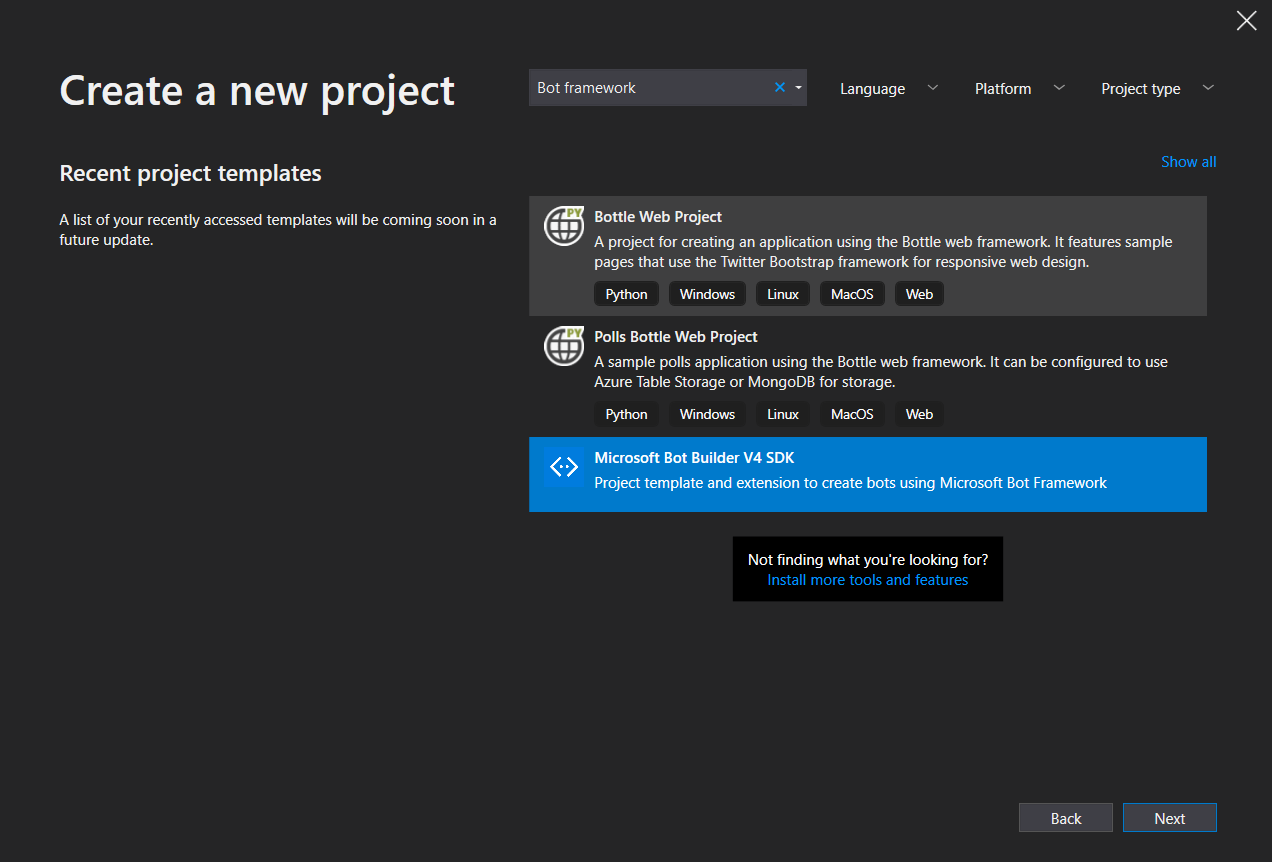
Create new bot application project or open the recent project, as like below
Provide project name and location in the following screen and click on create


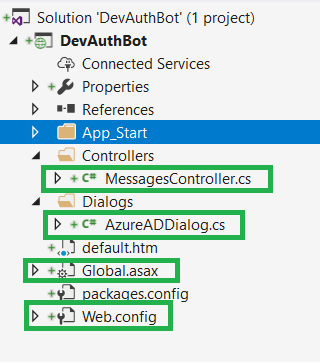
After click on create button, the solutions will create with Core, Empty and echo bot. You can select the required project version and select another project and delete
Empty Project :
A good template if you are familiar with Bot Framework v4, and simple want a basic skeleton project. Also a good option if you want to take sample code from the documentation and paste it into a minimal bot in order to learn.
Core Project :
Our most advanced template, the Core Bot template provides 6 core features every bot is likely to have. This template covers the core features of a Conversational-AI bot using LUIS. See the Core Bot Features table below for more details.
Echo Project :
A good template if you want a little more than "Hello World!", but not much more. This template handles the very basics of sending messages to a bot, and having the bot process the messages by repeating them back to the user. This template produces a bot that simply "echos" back to the user anything the user says to the bot.
Run the application:
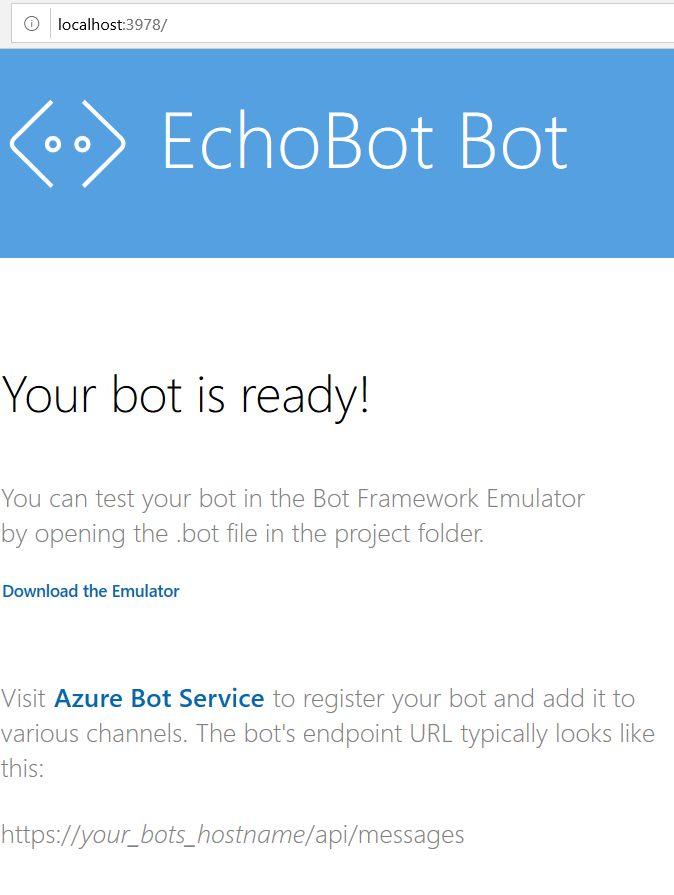
Run the app by clicking on the IIS Express button in Visual Studio (with the green play icon).
Check the port that your web application, if it is not running on port 3978 you'll need to update the Bot configuration. In order to update this setting, go to Visual Studio Project and open the EchoBot.bot file. Update the endpoint setting to match the port that your app is using.

Edit OnTurnAsync method:

Open EchoBotBot.cs and add the required namespace and modify the OnTurnAsync method, replace the content of the else statement with the following code snippet
  public async Task OnTurnAsync(ITurnContext turnContext, CancellationToken cancellationToken = default(CancellationToken))
       {
           // Handle Message activity type, which is the main activity type for shown within a conversational interface
           // Message activities may contain text, speech, interactive cards, and binary or unknown attachments.
           // see https://aka.ms/about-bot-activity-message to learn more about the message and other activity types
           if (turnContext.Activity.Type == ActivityTypes.Message)
           {
               // Get the conversation state from the turn context.
               var state = await _accessors.CounterState.GetAsync(turnContext, () => new CounterState());

               // Bump the turn count for this conversation.
               state.TurnCount++;

               // Set the property using the accessor.
               await _accessors.CounterState.SetAsync(turnContext, state);

               // Save the new turn count into the conversation state.
               await _accessors.ConversationState.SaveChangesAsync(turnContext);

               // Echo back to the user whatever they typed.
               var responseMessage = $"Turn {state.TurnCount}: You sent '{turnContext.Activity.Text}'\n";
               await turnContext.SendActivityAsync(responseMessage);
           }
           else
           {
               await turnContext.SendActivityAsync($"{turnContext.Activity.Type} event detected");
           }
       }


Test Bot Applications:

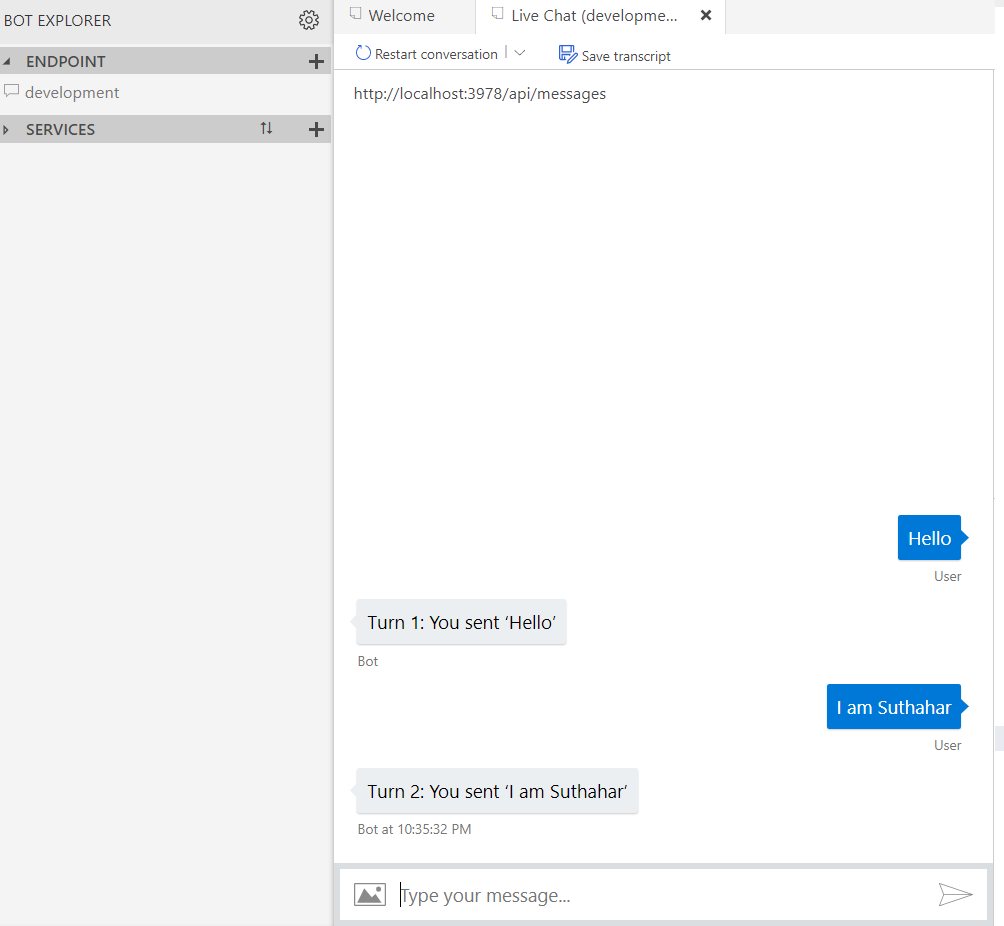
Open the Bot Framework Emulator from the Start Menu and Click Open Bot and select the file EchoBot.bot from project. Previously we had to provide the bot endpoint to the emulator but now it can read all the configuration from a .bot file.

Summary
In this article, your learned how to create a Bot application using Visual Studio 2019. If you have any questions/ feedback/ issues, please write in the comment box.


Friday, November 10, 2017

Building Bot Application with Azure AD Login Authentication using AuthBot


Introduction:
The Azure AD is the identity provider, responsible for verifying the identity of users and applications and providing security tokens upon successful authentication of those users and applications.in this article I have explained about create Azure AD authentication and integrate into bot application using AuthBot library.
                           
The Bot show very simple dialog with openUrl button and this button launches the web browser for validate user credential and AD will response the message with authentication code, you can copy same code and reply back to the bot, bot will validation and response the welcome message.
You can follow below given steps one by one and you will get to see an interesting demo at end of article.
Azure AD App registration:
I will show the steps given below for the azure application creation, user creation and permission configuration. While implementing bot application, We need Client ID, tenant, return URL, so here I will show how to get all the configuration information from the steps given below.
Step 1: Login to Microsoft Azure portal and choose Azure Active Directory from the sidebar.
Step 2: If you have not created AZURE Active directory, try to create new AD creation for tenant url or Select or add tenant url from Domain names sections
Step 3: Select Application Registration and Provide the details given below, name for the application , application type must be Web app/API, enter your application redirect URL and click on Create.
Step 4: We need to give the permission to access the application from Bot, so grand the permission. Select newly created Application > select Required Permission > Click Grand permission.
Step 5: create new user from users and groups sections (optional)
Step 6: Create client secret key from Application.  Select Application > Select keys > add new / copy client secret key .
Step 4: You can copy tenant, client ID and Client Secret and you can follow below steps for create and implement AD authentication in Bot
Create New Bot Application:
Let's create a new bot application using Visual Studio 2017. Open Visual Studio > Select File > Create New Project (Ctrl + Shift +N) > Select Bot application.

Microsoft Bot Framework
The Bot application template gets created with all the components and all required NuGet references installed in the solutions.
Install AuthBot Nuget Package:
The AuthBot provide Azure Active Directory authentication library for implement Azure AD login in Bot .
Right click on Solution, select Manage NuGet Package for Solution > Search “ AuthBot” > select Project and install the package.
You can follow given below steps for integrate AD authentication
Step 1: Select Web.config file and add Mode,resourceID,Endpointurl ,Tenant,clientID,clientSecret and redirect url appsettings property and replace Azure AD details as per below
 <appSettings>
   
   <add key="BotId" value="YourBotId" />
   <add key="MicrosoftAppId" value="" />
   <add key="MicrosoftAppPassword" value="" />

   
   <add key="ActiveDirectory.Mode" value="v1" />
   <add key="ActiveDirectory.ResourceId" value="https://graph.windows.net/" />
   <add key="ActiveDirectory.EndpointUrl" value="https://login.microsoftonline.com" />
   <add key="ActiveDirectory.Tenant" value="dxdemos.net" />
   <add key="ActiveDirectory.ClientId" value="2d3b5788-05a5-486d-b2a4-2772a4511396" />
   <add key="ActiveDirectory.ClientSecret" value="wU3oFBJ1gjWcB8Lo/fMaaCwg7ygg8Y9zBJlUq+0yBN0=" />
   <add key="ActiveDirectory.RedirectUrl" value="http://localhost:3979/api/OAuthCallback" />


 </appSettings>

Step 2: Select Global.asax.cs file and call all the bot app setting property and assign to AuthBot model class, like below
using System.Configuration;
using System.Web.Http;

namespace DevAuthBot
{
   public class WebApiApplication : System.Web.HttpApplication
   {
       protected void Application_Start()
       {
           GlobalConfiguration.Configure(WebApiConfig.Register);
           AuthBot.Models.AuthSettings.Mode = ConfigurationManager.AppSettings["ActiveDirectory.Mode"];
           AuthBot.Models.AuthSettings.EndpointUrl = ConfigurationManager.AppSettings["ActiveDirectory.EndpointUrl"];
           AuthBot.Models.AuthSettings.Tenant = ConfigurationManager.AppSettings["ActiveDirectory.Tenant"];
           AuthBot.Models.AuthSettings.RedirectUrl = ConfigurationManager.AppSettings["ActiveDirectory.RedirectUrl"];
           AuthBot.Models.AuthSettings.ClientId = ConfigurationManager.AppSettings["ActiveDirectory.ClientId"];
           AuthBot.Models.AuthSettings.ClientSecret = ConfigurationManager.AppSettings["ActiveDirectory.ClientSecret"];
       }
   }
}

Step 3: You can create a new AzureADDialog class to show the default login and logout UI Design dialog. Rightclick on Project, select Add New Item, create a class that is marked with the [Serializable] attribute (so the dialog can be serialized to state), and implement the IDialog interface.
using AuthBot;
using AuthBot.Dialogs;
using Microsoft.Bot.Builder.Dialogs;
using Microsoft.Bot.Connector;
using System;
using System.Configuration;
using System.Threading;
using System.Threading.Tasks;

namespace DevAuthBot.Dialogs
{
   [Serializable]
   public class AzureADDialog : IDialog<string>
   {

Step 4 :IDialog interface has only StartAsync() method. StartAsync() is called when the dialog becomes active. The method passes the IDialogContext object, used to manage the conversation.
       public async Task StartAsync(IDialogContext context)
       {
           context.Wait(MessageReceivedAsync);
       }

Step 5: Create a MessageReceivedAsync method and write the following code for the login and logout default dialog and create a ResumeAfterAuth for after the user login, bot will reply the user name and email id details.
       ///
       /// Login and Logout
       ///
       /// context">
       /// item">
       ///
       public virtual async Task MessageReceivedAsync(IDialogContext context, IAwaitable<IMessageActivity> item)
       {
           var message = await item;

           //endpoint v1
           if (string.IsNullOrEmpty(await context.GetAccessToken(ConfigurationManager.AppSettings["ActiveDirectory.ResourceId"])))
           {
               //Navigate to website for Login
               await context.Forward(new AzureAuthDialog(ConfigurationManager.AppSettings["ActiveDirectory.ResourceId"]), this.ResumeAfterAuth, message, CancellationToken.None);
           }
           else
           {
               //Logout
               await context.Logout();
               context.Wait(MessageReceivedAsync);
           }
       }

       ///
       /// ResumeAfterAuth
       ///
       /// context">
       /// result">
       ///
       private async Task ResumeAfterAuth(IDialogContext context, IAwaitable<string> result)
       {
           //AD resposnse message
           var message = await result;

           await context.PostAsync(message);
           context.Wait(MessageReceivedAsync);
       }

After the user enters the first message, our bot will reply and ask to login to the AD. Then, it waits for Authentication code and bot will reply the user details as a response like below.

Run Bot Application
The emulator is a desktop application that lets us test and debug our bot on localhost. Now, you can click on "Run the application" in Visual studio and execute in the browser


Test Application on Bot Emulator
You can follow the below steps to test your bot application.
  1. Open Bot Emulator.
  2. Copy the above localhost url and paste it in emulator e.g. - http://localHost:3979
  3. You can append the /api/messages in the above url; e.g. - http://localHost:3979/api/messages.
  4. You won't need to specify Microsoft App ID and Microsoft App Password for localhost testing, so click on "Connect".
Related Article:
I have explained about Bot framework Installation, deployment and implementation in the below article


Summary
In this article, you learned how to create a Bot Azure AD login authentication and Logout using AuthBot. If you have any questions/feedback/ issues, please write in the comment box.